

Using a Bosch Laser Level can make your projects more accurate and efficient. This tool is perfect for both professionals and DIY enthusiasts.
Understanding how to use the Bosch Laser Level properly is essential to achieve precise measurements. This handy tool can help you hang pictures, install shelves, or even do complex construction projects. Whether you are aligning wall tiles or setting up a new cabinet, the Bosch Laser Level ensures straight lines and perfect angles.
In this guide, we will take you through the steps to use your Bosch Laser Level effectively. Learn how to set it up, calibrate it, and get the most out of your investment. By the end, you will be able to handle this tool with confidence and precision.

Credit: www.youtube.com
Introduction To Bosch Laser Level
A laser level is a tool that projects a straight line. It helps in aligning objects on the same level. Bosch makes high-quality laser levels. They are used in construction and home projects. Laser levels save time and make work easier. They ensure accuracy in measurements.
Bosch laser levels have many features. They are easy to use. They are lightweight. They come with a clear display. The laser is very bright. It works indoors and outdoors. The tool is durable and reliable. It has different modes for various tasks.

Credit: www.boschtools.com
Unboxing And Setup
Open the box to find the Bosch Laser Level. There is also a tripod, a carrying case, and a manual. The package includes batteries too. Make sure you have all these items.
First, insert the batteries into the laser level. Turn on the device using the power button. Attach the laser level to the tripod. Make sure it is secure. Adjust the tripod to your desired height. The laser level is now ready to use.
Powering The Device
Turn on the Bosch Laser Level by pressing the power button. Ensure the device is on a flat surface for accurate results. Adjust the settings as needed for your project.
Battery Installation
Open the battery compartment cover. Insert the batteries as shown. Ensure the positive and negative ends match the symbols. Close the battery compartment cover tightly. Use only high-quality batteries for best performance. Check the battery level regularly.
Powering On/off
Press the power button to turn on the laser level. The laser lines will light up. Ensure the device is stable. Press the power button again to turn off the laser level. Always turn off when not in use. This saves battery life.
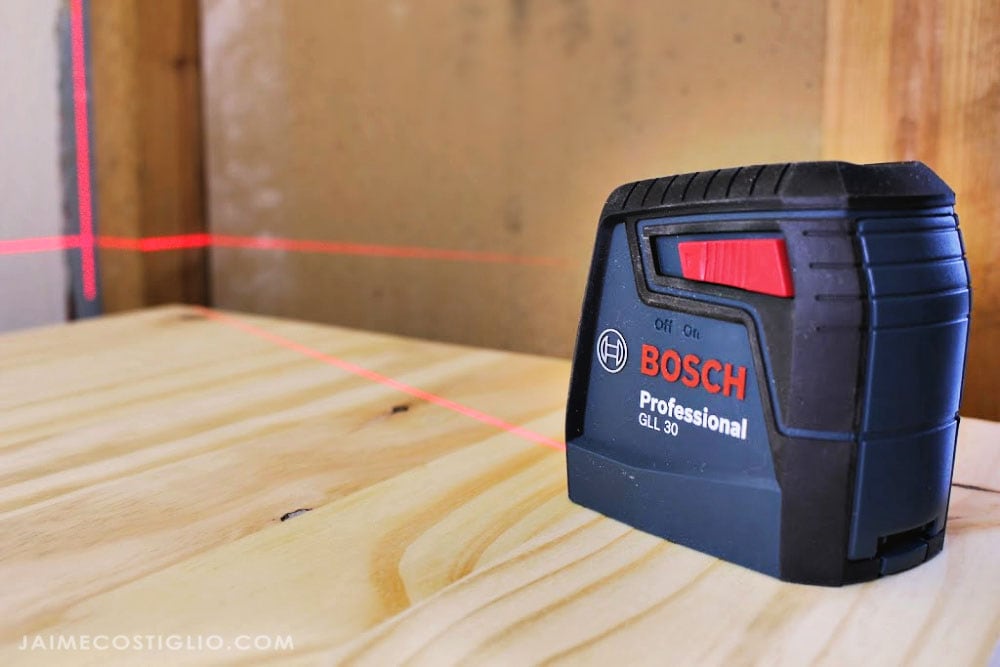
Credit: jaimecostiglio.com
Calibration Process
Calibration ensures your Bosch laser level is accurate. This is important for precise measurements. Without calibration, your results may be wrong. Always calibrate before using the device. This keeps your work reliable and trustworthy.
Follow these steps for proper calibration:
- Turn on the laser level.
- Place it on a flat surface.
- Check the bubble level.
- Adjust until the bubble is centered.
- Mark the laser point on the wall.
- Rotate the level 180 degrees.
- Mark the new laser point.
- Measure the distance between the points.
- If the distance is too big, recalibrate.
Using The Laser Level
Setting up the Bosch Laser Level is straightforward. Place it on a flat surface and turn it on. Adjust the position until the laser lines are perfectly aligned with your desired points.
Horizontal Leveling
Place the Bosch Laser Level on a flat surface. Make sure it is stable. Turn on the laser level. Adjust the level until the laser line is straight. Use the bubble vials to help you. Move the laser to different spots to check the level. Ensure the laser line stays straight.
Vertical Leveling
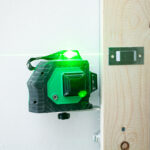
Place the Bosch Laser Level against a wall. Turn on the laser level. Adjust the level until the laser line is vertical. Use the bubble vials for accuracy. Move the laser up and down the wall. Check that the laser line remains vertical. Make small adjustments if needed.
Advanced Features
Self-Leveling Mode is very useful. The Bosch Laser Level adjusts itself. This feature saves time. It ensures accurate measurements. No manual adjustments needed. Ideal for quick setups. Great for both professionals and DIY users.
Tilt Mode is another great feature. It allows you to set angles. Perfect for sloped surfaces. Easy to use. Simply tilt the laser level. The device will lock the angle. This helps in projects like roof installations. Very handy for uneven ground. Makes your work more precise.
Maintenance Tips
Keep the Bosch Laser Level clean. Use a soft, dry cloth for cleaning. Avoid using water or harsh chemicals. Dust can affect accuracy. Always check the laser lens. Clean it gently if needed. A clean device works best.
Store the laser level in a dry place. Keep it in its case. This protects it from damage. Avoid high temperatures. Extreme heat can harm the device. Store in a safe spot. Out of children’s reach is best. Proper storage extends the device’s life.
Troubleshooting Common Issues
Learn to troubleshoot common issues with your Bosch Laser Level. Ensure accurate alignment and functionality by checking battery power, calibrating the device, and cleaning the lenses. Proper handling helps avoid errors and maintains performance.
Device Not Powering On
Check the batteries first. Ensure they are not dead. Replace them if needed. Inspect the battery contacts. They should be clean and free of rust. Sometimes, the power button can be stuck. Gently press it a few times. If it still doesn’t work, consult the user manual. It may have specific instructions for your model.
Inaccurate Measurements
Ensure the surface is flat. Uneven surfaces can cause errors. Check if the device is level. Adjust if necessary. Clean the laser lens. Dust or smudges can affect accuracy. Confirm the calibration. Refer to the manual for steps. If the problem persists, the device might need servicing.
Safety Precautions
Ensure the Bosch Laser Level is on a stable surface. Wear safety goggles to protect your eyes from laser exposure. Keep the device out of children’s reach.
Proper Handling
Handle the Bosch laser level with care. Avoid dropping it or knocking it against hard surfaces. Keep it in a secure place when not in use. Always use the protective case provided. This prevents damage and extends its lifespan. Keep the device dry and clean. Moisture can damage it. Clean it with a soft, dry cloth.
Avoiding Laser Exposure
Avoid looking directly into the laser beam. It can harm your eyes. Never point the laser at people or animals. Always use laser safety glasses if available. Be aware of reflective surfaces. They can redirect the laser beam. Keep the laser level away from children. Store it in a high place, out of their reach.
Frequently Asked Questions
How Do You Calibrate A Bosch Laser Level?
To calibrate a Bosch laser level, follow the user manual instructions. Typically, it involves placing the level on a flat surface, turning it on, and using the calibration screws to adjust the laser to the correct position.
How Long Does The Battery Last?
The battery life of a Bosch laser level varies by model. On average, it can last up to 20 hours of continuous use. Always check the specific model’s user manual for exact battery life details.
Can Bosch Laser Levels Be Used Outdoors?
Yes, Bosch laser levels can be used outdoors. Ensure you have a model with a brighter laser or use a laser detector for better visibility in daylight conditions.
How Do You Mount A Bosch Laser Level?
To mount a Bosch laser level, use the provided mounting accessories. Common methods include using a tripod, wall mount, or placing it on a flat surface. Always ensure the laser level is secure and stable before use.
Conclusion
Using the Bosch Laser Level is straightforward and efficient. Follow the steps outlined above for accurate results. Practice makes perfect. Soon, you’ll handle it with ease. A reliable tool for both beginners and pros. Enjoy your DIY or professional projects.
Happy leveling!
Related posts:
 Best Green Laser Level for Precision and Versatility in Your Projects
 Best Laser Level for Outdoors: Top Picks for Precision Construction
 Best Budget Laser Level: Top Affordable Options for Precise Alignments
 Best Laser Level for the Money: Top Picks for Every Budget
 Best Laser Level for Framing Walls: Top Picks for Precision and Ease
 How to Use Laser Level for Grading
 How to Use Dewalt Laser Level
 How to Use Laser Level Without Tripod
 Best Outdoor Laser Level for Builders: Top Picks for Precision and Durability
 Outdoor Laser Levels: Achieve Precision and Efficiency in Your Projects