
Using a laser level on a wall is simple and accurate. It ensures your lines are straight and your projects look professional.
A laser level is a handy tool for various home projects. Whether you’re hanging pictures, installing shelves, or aligning tiles, a laser level helps you achieve perfect results. This tool projects a straight line across your wall, acting as a reliable guide.
You don’t need to be a professional to use it. With a bit of guidance, anyone can operate a laser level with ease. In this blog post, we will explore how to use a laser level on a wall. By the end, you’ll know the steps to set up and use this tool effectively. Let’s get started on making your projects look flawless!

Credit: laserslevel.com
Introduction To Laser Levels
Using a laser level on a wall ensures accurate alignment for pictures, shelves, or tiles. Start by mounting the laser level securely. Align the beam with your desired guide marks.
What Is A Laser Level?
A laser level is a tool that projects a line. It helps to create straight lines on walls. This tool is very handy for many tasks. It ensures accuracy and saves time.
Benefits Of Using A Laser Level
Using a laser level has many benefits. It gives precise lines. This tool is easy to use. It helps to avoid mistakes. It makes work faster. Laser levels are also versatile. They can be used for many projects. This tool is good for both small and big tasks. It helps to achieve perfect results.
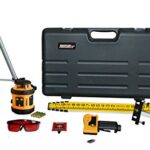
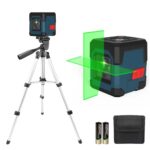
Types Of Laser Levels
Line laser levels project a straight line on walls. Use them for aligning pictures, shelves, or tiles. They are simple to use and very accurate. Place the device on a flat surface or tripod. Turn it on, and the line will appear on the wall. Make sure the line is level before starting your project.
Rotary laser levels create a 360-degree horizontal plane. They are great for large spaces like rooms or outdoor areas. Set the device in the center of the room. Turn it on, and it will spin, showing a level line around the room. Ideal for construction and landscaping.
Dot laser levels project single or multiple dots. Use them for transferring points from floor to ceiling. They are perfect for tasks like installing lights or plumbing. Place the device where you need a reference point. Turn it on, and the dots will appear on the wall. Easy and precise for specific points.
Choosing The Right Laser Level
Using a laser level on a wall ensures straight lines for hanging pictures or installing shelves. Adjust the laser to the desired height, then mark the line where the light hits the wall.
Assessing Your Needs
Think about what you need the laser level for. Different tasks need different tools. Do you need it for hanging pictures or shelves? Maybe for construction work? Knowing your needs helps in choosing the right one.
Key Features To Consider
Some laser levels have self-leveling features. These are helpful for beginners. Range is also important. How far does the laser reach? Accuracy matters too. A good laser level is precise. Durability is key. Look for one that can handle drops. Ease of use is important. Some laser levels are easier to use than others. Battery life should be long-lasting. You don’t want it dying mid-task.
Preparing The Wall
Align your laser level on the wall by marking the desired height. Secure it firmly and adjust until perfectly level. This ensures straight lines for accurate measurements and installations.
Cleaning The Surface
Start by removing any dust and debris. Use a soft cloth or a brush. Make sure the wall is dry. This helps the laser level work better. A clean surface ensures accurate results. Dirt can interfere with the laser beam. It is important to have a smooth wall. It helps the laser stick properly.
Marking Reference Points
Use a pencil for this step. Make small marks where needed. These marks guide your laser level. They help you align the laser accurately. Keep the marks light. You should be able to erase them later. Double-check the measurements. Ensure they are correct before starting. This will save time and effort.
Setting Up The Laser Level
First, choose a stable surface for the laser level. Use a tripod if available. Attach the device securely. Ensure it is at the desired height. Adjust the legs to make it even. Check the bubble levels. They should be centered.
Turn on the laser level. Wait for it to self-level. If it does not, adjust manually. Use the knobs to fine-tune. Check the laser line on the wall. It should be straight. Make small adjustments as needed. Your laser level is now calibrated.
Using The Laser Level
Place the laser level on a flat surface. Turn on the device. The laser beam will shoot out. Point it at the wall. Adjust until the line is straight. Check the line with a ruler. Make sure it is level. Mark the wall where needed. This helps with precise placements.
Ensure the laser level is stable. Use a tripod if available. Double-check the laser line. Compare with a manual level. Small errors can happen. Correct them immediately. Always recheck before drilling or nailing. This saves time and effort. Proper use gives better results.
Common Mistakes To Avoid
Avoid common mistakes when using a laser level on a wall. Ensure the surface is clean and the device is level. Double-check measurements for accuracy.
Ignoring Calibration
Always check if your laser level is calibrated. An uncalibrated level can give incorrect readings. This can ruin your work. Follow the user manual to calibrate it. Each device might be different. Calibration ensures accuracy. Do it before each project.
Overlooking Safety Precautions
Safety is very important. Always wear safety glasses. The laser light can harm your eyes. Do not look directly into the beam. Make sure the area is clear. Keep children and pets away. Follow the safety instructions in the manual. This prevents accidents and injuries.
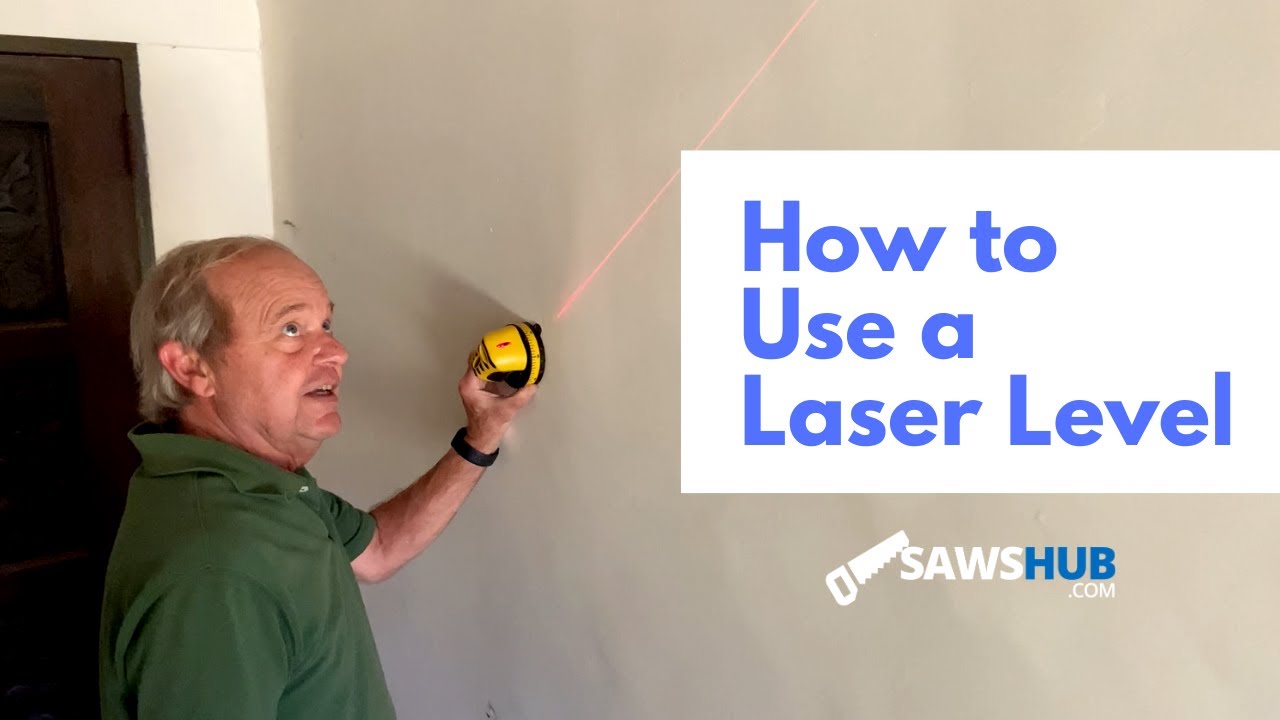
Credit: m.youtube.com
Maintenance And Care
Keep the laser level clean for best performance. Dust and dirt can affect the laser. Use a soft, dry cloth to wipe the device. Avoid using water or chemical cleaners. These can damage the laser. Check the lens often. Clean it gently with a lens cloth. Store the laser level in its case when not in use.
Store the laser level in a cool, dry place. Avoid extreme temperatures. They can harm the device. Keep it in its protective case. This helps prevent damage. Remove the batteries if you won’t use it for a long time. Check the manual for other storage tips. Proper storage can extend the life of your laser level.
Applications Of Laser Levels
Laser levels are great for hanging pictures straight. They help ensure shelves are level. This tool is useful for installing cabinets. It ensures everything lines up. Laser levels are also handy for painting stripes or patterns on walls. They make sure lines are straight.
When doing tile work, laser levels help align tiles properly. They make tasks like mounting TVs easier. Laser levels are essential for DIY projects at home.
Construction workers use laser levels for many tasks. They ensure walls are vertical and floors are level. This tool is key in setting up foundations. It ensures they are straight and true. Laser levels help in framing walls. They assist in plumbing work too. The tool makes sure pipes are level.
Electricians use laser levels for installing outlets. They make sure they are at the same height. This tool is also useful for aligning windows and doors. Laser levels are vital in professional construction.

Credit: m.youtube.com
Frequently Asked Questions
How Do You Use A Laser Level On A Wall?
To use a laser level on a wall, first, mount it securely. Then, turn it on and align the beam with your desired mark. Adjust as needed.
Can A Laser Level Be Used Vertically?
Yes, a laser level can be used vertically. Set it up, ensure it’s plumb, and align the beam with your vertical reference points.
How Do You Mount A Laser Level On A Wall?
Mount a laser level on a wall using brackets or adhesive mounts. Ensure it is level and secure before using.
What Surfaces Can A Laser Level Be Used On?
A laser level can be used on various surfaces including drywall, concrete, and wood. Ensure the surface is stable for accurate results.
Conclusion
Using a laser level on a wall simplifies alignment tasks. It ensures straight lines for hanging pictures or shelves. Follow the steps in this guide carefully. Practice helps improve accuracy. A laser level saves time and effort. It makes DIY projects easier and more precise.
Try it on your next home improvement project. Enjoy the results of a well-leveled wall.
Related posts:
 Best Rotary Laser Level: Top Self-Leveling Kits for Precision Construction
 Best Laser Level for Builders: Top Picks for Precision and Efficiency
 Best Laser Level for Home Use: Top Picks for Precision Projects
 Best Laser Level for Construction: Top Picks for Precision Work
 Best Inexpensive Laser Level: Top Affordable Picks for Precision
 How to Use Laser Level Without Tripod
 What is a Laser Level
 How Much is a Laser Level
 Best Rotary Laser Level for Builders: Top Picks for Precision and Efficiency
 Best Laser Level With Tripod for Precise Home Renovation Projects