
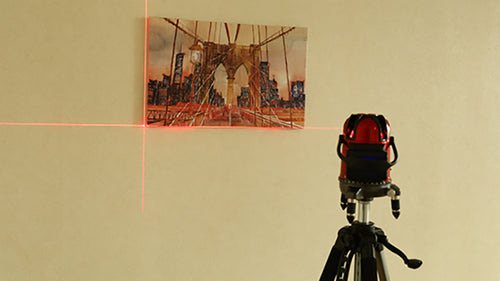
Hanging pictures straight can be tricky. A laser level makes it easy.
Using a laser level to hang pictures ensures precision and saves time. This tool projects a straight line on your wall, guiding you to align frames perfectly. No more guessing or crooked pictures! Whether you’re decorating a new space or updating your gallery wall, mastering the laser level technique can transform your home decor.
In this guide, you’ll learn step-by-step how to use a laser level effectively. From setting it up to making sure your pictures are straight, we’ve got you covered. Get ready to hang your pictures like a pro, with confidence and ease.
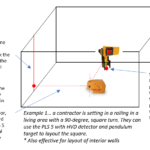
Credit: www.engineersupply.com
Gathering Tools
Essential Tools List:
- Laser level
- Measuring tape
- Pencil
- Hammer
- Nails
- Level (optional)
Choosing the right laser level is key. There are two main types. Rotary laser levels are good for large spaces. Line laser levels are best for small rooms. Make sure to pick one that suits your task.
Preparing The Wall
First, clean the wall where you want to hang the picture. Use a damp cloth to remove dust and dirt. Make sure the wall is dry before proceeding. A clean surface helps the picture stay in place. It also prevents any marks or stains. This step is very important for a neat look.
Decide where you want to hang the picture. Use a pencil to mark the spot. Measure the height from the floor. This helps keep the picture straight. Use a tape measure for accuracy. Mark the top and bottom of the picture. Ensure the marks are light and easy to erase.
Setting Up The Laser Level
Find a stable surface for the laser level. A table or a tripod works well. Place the level on this surface. Make sure it is firm and steady. The surface should be close to the wall. This helps the laser beam reach the wall easily.
Turn on the laser level. Let it self-level if it has this feature. If not, use a bubble level to check. Adjust the device until the bubble is centered. This ensures the laser line is straight. Now you are ready to hang pictures.
Aligning The Pictures
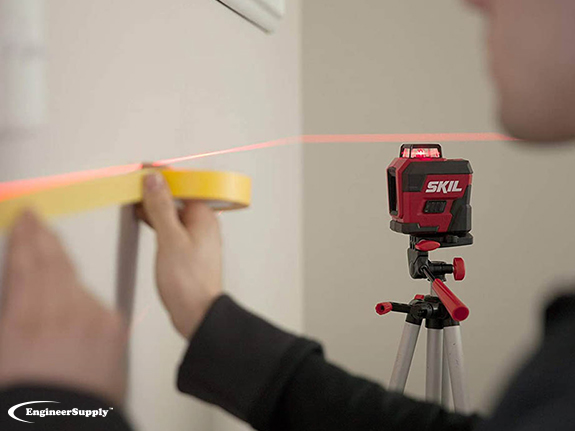
First, place the laser level on a flat surface. Turn it on and make sure the line is straight. Adjust the height so the laser line is at the desired level. This line will guide you. Place your picture frames along this line. Check the alignment by stepping back.
Hold each picture frame against the wall, aligned with the laser line. Use a pencil to mark the drill points. These marks will show where the nails or screws need to go. Make sure the marks are clear and visible. Repeat for each picture frame.
Drilling And Installing Hooks
Choose a drill bit that matches the size of your screws. Measure the screw‘s diameter for accuracy. A bit too large makes the hole too big. A bit too small makes it hard to screw in. Use a tape measure to double-check.
Place the hook on your marked spot. Start drilling carefully into the wall. Insert the screw through the hook. Tighten with a screwdriver. Ensure the hook is secure and firm. Check alignment with the laser level.

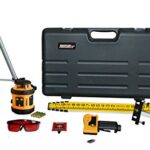
Credit: www.youtube.com
Hanging The Pictures
Using a laser level to hang pictures ensures perfect alignment. This tool helps maintain a straight line, making the process easier and more accurate. Save time and avoid mistakes with this handy device.
Placing The Pictures
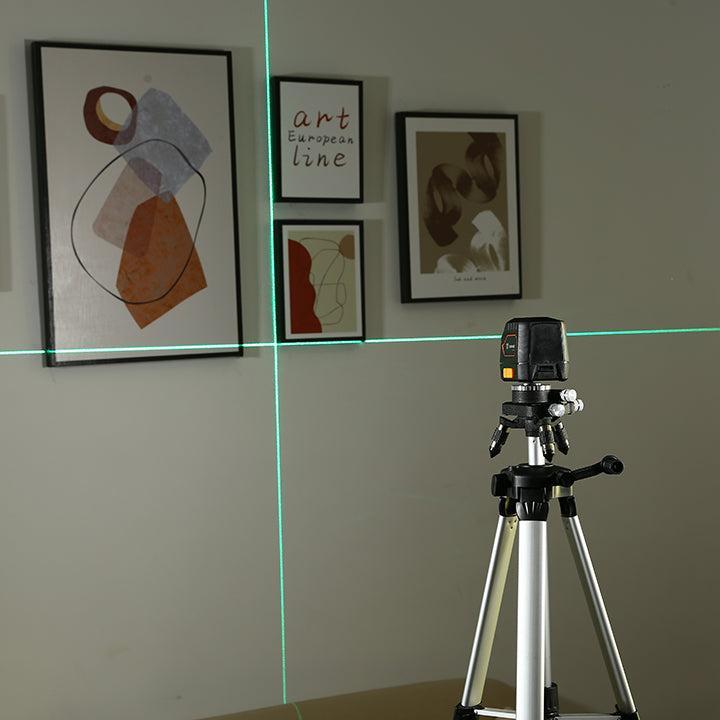
First, decide where to hang your pictures. Use a pencil to mark the spot. Keep the marks light so they are easy to erase. Next, hold the picture in place. Use a tape measure to ensure it is centered. Then, use the laser level. Turn it on and project a straight line. Adjust the picture until it is level. Secure the picture with nails or hooks. Repeat for each picture.
Ensuring Level Alignment
Start by turning on the laser level. Project a horizontal line. Place the laser level on a stable surface. Adjust the height to match your marks. Make sure the line is straight. Use a ruler or tape measure to check. Align the top of the picture frame with the laser line. This ensures your pictures are level. Always double-check before securing the nails. Adjust if necessary.
Final Adjustments
Once the pictures are on the wall, check if they are level. Look closely at the laser line and the top of each picture. The top should align with the laser line. If they match, the picture is level. If not, adjustments are needed.
If a picture is not level, gently adjust it. Move it up or down until it lines up with the laser. Check again to be sure. Sometimes tiny tweaks make a big difference. Double-check the levelness to confirm. Continue adjusting until satisfied with the result.
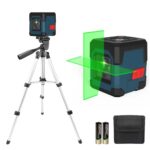
Credit: www.dekotools.com
Frequently Asked Questions
What Is A Laser Level?
A laser level is a tool that projects a laser beam to establish a straight and level line. It helps in precise measurements.
Why Use A Laser Level For Hanging Pictures?
Using a laser level ensures your pictures are perfectly aligned. It saves time and reduces errors compared to traditional methods.
How Do You Set Up A Laser Level?
Set up the laser level on a tripod or flat surface. Turn it on, and align it with the wall.
Can A Laser Level Be Used On Any Wall?
Yes, a laser level can be used on any wall. It works on painted, wallpapered, or tiled surfaces.
Conclusion
Hanging pictures with a laser level is simple and effective. Follow these steps for perfect alignment. Measure and mark your desired spots. Use the laser level to ensure straight lines. Secure the pictures on the wall. This method saves time and reduces frustration.
Your walls will look professionally decorated. Practice makes it easier each time. Enjoy a beautifully arranged space with minimal effort. Happy decorating!
Related posts:
 Best Rotary Laser Level: Top Self-Leveling Kits for Precision Construction
 Best Laser Level for Builders: Top Picks for Precision and Efficiency
 Best Laser Level for Home Use: Top Picks for Precision Projects
 Best Laser Level for Construction: Top Picks for Precision Work
 Best Inexpensive Laser Level: Top Affordable Picks for Precision
 What is a Laser Level
 How Much is a Laser Level
 How to Use Laser Level on Wall
 Best Rotary Laser Level for Builders: Top Picks for Precision and Efficiency
 Best Laser Level With Tripod for Precise Home Renovation Projects