

Replacing a shower arm adapter is easier than you think. With the right tools and steps, anyone can do it.
A shower arm adapter connects the shower arm to the showerhead. Over time, it may wear out or get damaged. Replacing it can improve water flow and prevent leaks. Whether you’re a DIY enthusiast or a beginner, this guide will help you.
We’ll break down the process into simple steps. You’ll learn what tools you need and how to use them. By the end, you’ll have a new shower arm adapter installed. Ready to get started? Let’s dive in and make your shower work like new again!

Credit: www.amazon.com
Tools And Materials Needed
You need a wrench. It helps to turn the shower arm. A screwdriver is also important. This is for removing any screws. An adjustable plier is good. It grips the shower arm tightly. Teflon tape is helpful. This prevents leaks.
A new shower arm adapter is needed. It must fit your shower. Get a cleaning cloth. Use it to wipe dirt. A bucket is useful. It catches any water. You may also need some plumber’s putty. This seals the connection well.
Safety Precautions
Before starting, turn off the water supply. This prevents water from spilling. Find the shut-off valve and turn it clockwise. Check if the water is completely off by turning on the shower. There should be no water flow.
Place a towel or rag in the shower. This will catch any small parts that may fall. It also prevents scratches on the shower floor. Keep a bucket nearby to catch any remaining water. Make sure your tools are within reach.
Removing The Old Shower Arm
To remove the old shower arm, start by turning it counterclockwise with a wrench. Once loosened, unscrew it by hand.
Loosening The Shower Arm
Start by turning off the water supply. Use a wrench to grip the shower arm. Turn the wrench counterclockwise. Apply firm pressure. This will loosen the shower arm. You might need some elbow grease. Be patient and persistent. If stuck, use penetrating oil. Wait for it to seep in. Try again after a few minutes.
Detaching The Old Adapter
Once the shower arm is loose, remove it by hand. Twist it counterclockwise until it comes off. You will see the old adapter. Use pliers to grip the adapter. Turn it counterclockwise. Remove the old adapter carefully. Clean the exposed threads. Use a cloth to wipe away any debris. Ensure the area is clean for the new adapter.

Credit: www.ebay.com
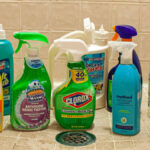
Cleaning The Connection Area
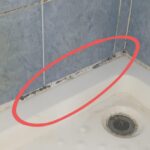
First, use a cloth to wipe the area. This helps remove loose dirt and grime. Check for any hard debris stuck inside. Use a small brush to clean it out. Ensure the connection area is clear before moving on. This step is crucial for a good seal later.
Look closely at the connection area. Cracks or wear can cause leaks. If you find damage, it is best to fix it first. Ensure all parts are in good condition before you continue. This will help your new shower arm last longer.
Preparing The New Adapter
Always select the correct adapter. Check the size and type. It must match your shower arm. Bring the old one to the store. Compare it with the new options. This ensures a proper fit. You may ask for help if needed.
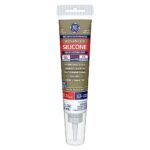
Plumber’s tape helps prevent leaks. Wrap it around the new adapter threads. Do it clockwise. Cover all threads. Ensure it is smooth and tight. This makes a good seal.

Credit: www.amazon.com
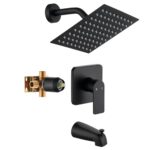
Installing The New Shower Arm Adapter
Easily replace the shower arm adapter by turning off the water supply. Unscrew the old adapter, then attach the new one securely. Enjoy your upgraded shower experience!
Positioning The New Adapter
First, clean the shower pipe threads. Make sure they are dry. Then, take the new adapter. Place it on the shower pipe. Align the threads carefully. This makes it easier to screw in.
Use Teflon tape on the shower pipe threads. Wrap the tape around the threads. This helps to seal the connection. It prevents leaks. Now, the adapter is ready to be secured.
Securing The Adapter In Place
Use a wrench to tighten the adapter. Turn the wrench clockwise. Do not over-tighten. This can damage the adapter. Tighten until it feels snug.
Check the adapter. Make sure it is straight. If it is crooked, loosen it. Adjust and tighten again. Test for leaks by turning on the water. If there are no leaks, the job is done.
Reattaching The Shower Arm
Replacing a shower arm adapter involves removing the old one and installing a new one securely. Use a wrench to loosen the old adapter, then twist it off. Attach the new adapter, ensuring it is tight and leak-free.
Aligning The Shower Arm
Ensure the shower arm threads match the wall pipe threads. Insert the shower arm into the wall pipe gently. Rotate the shower arm by hand until it feels snug. Check the alignment to make sure it is straight. Adjust if necessary before tightening.
Tightening The Connection
Use a wrench for a secure connection. Wrap a cloth around the arm to prevent scratches. Tighten the shower arm carefully to avoid over-tightening. Ensure the shower arm is firm but not too tight. Test the shower arm for any movement or leaks. Make adjustments if needed.
Testing For Leaks
Check for leaks after replacing the shower arm adapter. Turn on the water and inspect for any drips. Tighten connections if needed to ensure a secure fit.
Turning On The Water Supply
Turn on the water supply slowly. This helps prevent sudden pressure. Make sure the shower handle is in the off position. This ensures water does not spray out. Listen for any unusual sounds. Pay attention to the pipes. They should not make loud noises.
Checking For Water Leaks
Look around the shower arm adapter. Check all connections closely. Feel for any wet spots. Use a dry cloth to wipe around the area. This helps detect small leaks. Watch for drips or streams of water. A small leak can become a big problem. Tighten connections if you find any leaks. Use a wrench if needed. Be careful not to over-tighten. This can damage the adapter. If the leak persists, you may need to reinstall the adapter.
Final Adjustments
Make sure the water is off before starting. Use a wrench to unscrew the old shower arm adapter. Replace it with a new one, ensuring it’s tightly secured.
Adjusting The Shower Arm
Make sure the shower arm is tight. Use a wrench if needed. Do not over-tighten. Check for any leaks. Turn on the water slowly. Look for drips around the joint. If you see leaks, turn off the water. Tighten the arm a bit more. Repeat until no leaks are seen.
Ensuring Proper Function
Turn on the shower. Check the water flow. It should be even. The water should not spray in odd directions. Adjust the showerhead angle. Make sure it points where you want. Enjoy your shower.
Frequently Asked Questions
How Do I Remove A Shower Arm Adapter?
To remove a shower arm adapter, use a wrench to loosen it counterclockwise. Be gentle to avoid damaging the pipes.
What Tools Are Needed To Replace A Shower Arm Adapter?
You’ll need a wrench, plumber’s tape, and possibly a pipe thread sealant. These tools ensure a secure installation.
Can I Replace A Shower Arm Adapter Myself?
Yes, you can replace it yourself. Follow the steps carefully and ensure you have the right tools.
How Long Does It Take To Replace A Shower Arm Adapter?
Replacing a shower arm adapter typically takes around 30 minutes. This includes removing the old adapter and installing the new one.
Conclusion
Replacing a shower arm adapter can be simple with the right steps. Follow the guide carefully. Gather your tools before starting. Turn off the water supply first. Unscrew the old adapter gently. Install the new adapter securely. Check for any leaks.
Tighten connections if needed. Finally, enjoy your upgraded shower. Remember, patience and care lead to success. Happy plumbing!
Related posts:
 Best Hair Shower Filter: Transform Your Hair and Skin With Ease
 Best Bath And Shower Cleaner: Top Foaming Sprays for Sparkling Bathrooms
 Best Brush to Clean Shower: Top Picks for Effortless Scrubbing
 Best Caulk to Use in Shower: Top Waterproof Sealants for Bathrooms
 Best Tub And Shower Faucet: Top Matte Black Sets for Modern Bathrooms
 What is the Best Shower Cleaner
 What are Shower Steamers: Transform Your Shower Experience
 How Do Shower Systems Work: The Ultimate Guide to Modern Showers
 How to Install Shower Valve: Step-by-Step DIY Guide
 How to Get Rid of Black Mold in Shower: Ultimate Guide