
Removing a shower cartridge might seem complex. But it can be simple with the right steps.
A faulty shower cartridge can cause leaks or temperature issues. Fixing it yourself saves time and money. In this guide, we will walk you through the process. You don’t need to be a plumbing expert. All you need are some basic tools and a little patience.
By the end of this article, you will know how to remove a shower cartridge safely and efficiently. Let’s dive in and get your shower back in top shape.
You May Like

- REPLACEMENT RP46074 SHOWER VALVE CARTRIDGE ASSEMBLY – TOVEN-RV RP46074 valve cartridge…
- PRESSURE BALANCE DESIGN – RP46074 monitor shower cartridge features single function…
- PREMIUM QUALITY – Single-handle universal valve cartridge repair assembly is made with…
- EASY INSTALLATION – RP46074 cartridge is easy to install, no other tools or modifications…

- Get Everything You Need: 1222 replacement cartridge; 104421 cartridge puller removal tool…
- 1222 Replacement Cartridge: Durable brass and plastic construction
- Cartridge Puller Removal Tool: Made of premium alloy material, help you to remove the…
- Fits Moen one hanlde Posi Temp faucet, consistently maintain water pressure and control…

- FlowRite Non-OEM Replacement Cartridge Assembly includes both Gerber SafeTemp 2 Parts…
- Single lever pressure-balance valves protects you and your family from sudden water…
- Tested design and durable construction for long lasting performance.
- Kit includes both control cartridge and pressure balance valve.
- REPLACEMENT PART: Ideal for repairing problematic shower valve plumbing fixtures without…
- PEACE-OF-MIND: Moen shower cartridges are designed for hassle-free installation
- INCLUDES: Moen 1222 One-Handle Posi-Temp Faucet Cartridge Replacement for Moen Tub Shower…
- ORIGINAL EQUIPMENT MANUFACTURER: Authentic Moen faucet replacement part

- Fits VB8 & JV8 Bodies
- Backwards Compatibilty with Legacy 0X8/JX8 Cartridges
- Ceramic Disc Cartridge
- Integrated Temperature Limit Stop
Gather Your Tools
Before removing a shower cartridge, gather essential tools like a wrench, pliers, and a screwdriver. These will help you complete the task efficiently.
Essential Tools List
To remove a shower cartridge, you need some tools. These tools make the job easier. Here is a list:
- Screwdriver – Flathead or Phillips
- Adjustable wrench
- Plumber’s grease
- Cartridge puller – Sometimes needed
- Needle-nose pliers
Safety Gear
Safety is very important. Always wear gear to protect yourself. Here is what you need:
- Safety goggles – Protect your eyes
- Gloves – Keep your hands safe
- Rags or towels – Clean up water
Turn Off Water Supply
The main valve is often near the water meter. Look in the basement or outside the house. Turn the valve clockwise to shut off the water. This stops water flow to the house.
Turn on a tap in the house. Water should stop running. If water still flows, the valve is not fully closed. Tighten the valve more until water stops. Now you are ready to remove the shower cartridge.
Access The Shower Cartridge
First, turn off the water supply. This stops water flow. Next, locate the screw on the handle. Use a screwdriver to remove it. Gently pull the handle off. If it’s stuck, wiggle it a bit. Be careful not to use too much force. This can break the handle. Keep the screw safe. You will need it later.
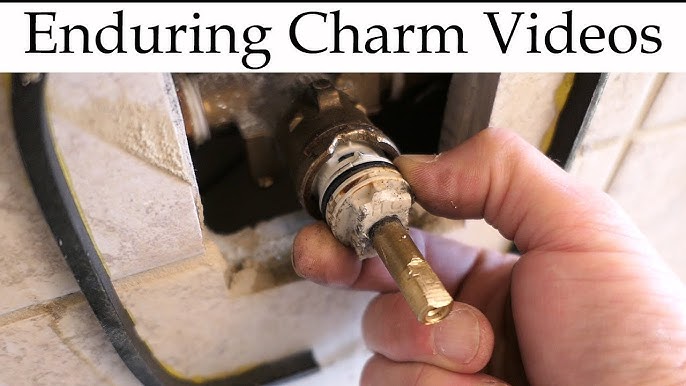
Find the trim plate around the handle. Remove the screws holding it. There may be two or more. Use a screwdriver for this step. Gently pull the trim plate off. Set it aside carefully. Look for any additional screws or clips. Remove them as well. This will expose the cartridge.
Credit: www.youtube.com
Extract The Old Cartridge
Turn off the water supply first. Locate the screws holding the cartridge. Use a screwdriver to loosen these screws. Keep the screws safe for later use. This step is crucial for removing the cartridge.
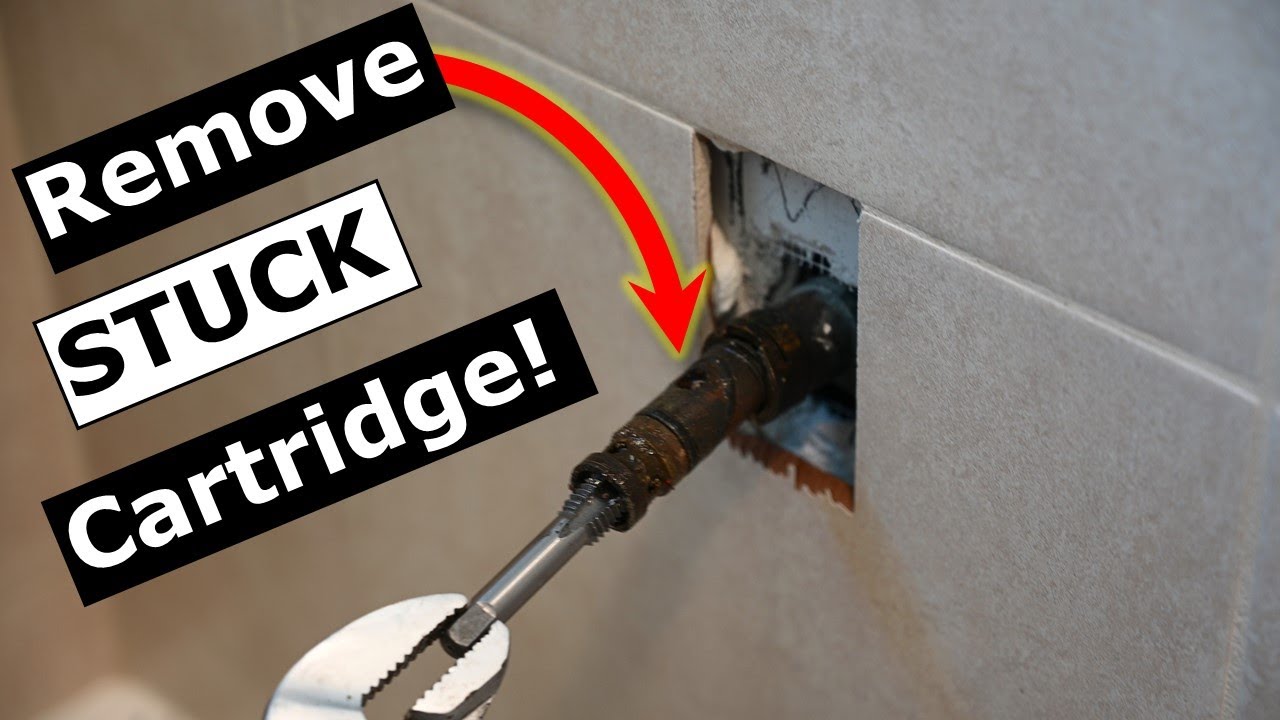
Once the screws are loose, grab the cartridge firmly. Slowly pull it out of the fixture. If it is stuck, use pliers for better grip. Take care not to damage any parts. The cartridge should come out smoothly.
Inspect And Clean Area
Inspect and clean the area thoroughly before removing the shower cartridge. This step ensures a smooth and mess-free process.
Check For Debris
First, turn off the water supply. This is very important. Remove the handle of the shower. Look inside for any loose debris. Small pieces can block the flow. Use a flashlight to see better. Clean the area around the cartridge. Dust and dirt can cause problems. Use a small brush or cloth. Make sure it’s all clean before moving on.
Clean Inside Valve
Take a look inside the valve. Check for any build-up. Lime and rust can clog the valve. Use a vinegar solution to clean it. Pour some vinegar on a cloth. Rub it inside the valve. This will help break down the build-up. Rinse with clean water. Make sure it’s all clean. This step ensures smooth water flow.

Credit: www.1tomplumber.com
Install New Cartridge
Learn how to remove a shower cartridge easily. First, turn off the water supply. Then, remove the handle and unscrew the cartridge.
Insert New Cartridge
Place the new cartridge into the faucet. Ensure it is aligned properly. Push it in until it is snug. You may need to twist it a bit. Check that it is seated well. This step is crucial. A poorly seated cartridge can cause leaks.
Secure Cartridge Screws
Find the screws that hold the cartridge. Use a screwdriver to tighten them. Make sure they are secure but do not overtighten. Overtightening can damage the faucet. Check the screws one more time. They should be firm but not too tight.
Reassemble Shower Components
First, place the trim plate over the shower valve. Make sure it is lined up correctly. Use screws to secure the plate. Tighten them carefully, but not too tight. The trim plate should be firm and even.
Slide the handle back onto the valve stem. Ensure it fits snugly. Use a screw to secure the handle in place. Tighten the screw, but don’t overdo it. Test the handle to make sure it turns smoothly. Everything should work as before.
Test The New Installation
Slowly turn on the water supply. This helps to prevent sudden pressure. Ensure all connections are tight. Check for any unusual sounds. These can indicate a problem. Watch the cartridge area closely. Look for any water seepage.
Inspect all joints and connections. Make sure they are dry. A dry surface means no leaks. If you find any leaks, tighten the connections. Sometimes, you may need to reapply plumber’s tape. Check again after tightening. Ensure everything remains dry.
Frequently Asked Questions
What Tools Do I Need To Remove A Shower Cartridge?
You will need pliers, a screwdriver, and possibly an Allen wrench. These tools will help you remove the cartridge safely.
How Do I Identify A Faulty Shower Cartridge?
A faulty cartridge may cause leaks, low water pressure, or difficulty in adjusting water temperature.
Can I Remove A Shower Cartridge Without Turning Off Water?
No, always turn off the water supply before removing the cartridge. This prevents water damage and ensures safety.
How Long Does It Take To Remove A Shower Cartridge?
Removing a shower cartridge usually takes about 30 minutes. Time may vary depending on your experience and the cartridge type.
Conclusion
Removing a shower cartridge can seem difficult, but it’s manageable. Follow the steps carefully. Gather the right tools. Turn off the water supply. Be patient and take your time. Each step matters for a smooth process. Now, you can fix shower problems on your own.
Save money and avoid calling a plumber. Enjoy a perfectly functioning shower. Feel confident in your DIY skills. Happy repairing!
Related posts:
 Best GPM for Shower Head: Top High-Pressure Options to Upgrade
 Best Grout for Shower Tile: Top Choices to Restore and Renew
 Best Folding Shower Chair: Top Picks for Comfort and Safety
 Best Metal Shower Head: Top High Pressure Options for Ultimate Shower Experience
 Best Shower Filter for Hair And Skin: Top Vitamin-Infused Choices
 Can You Shower With Jewelry? Essential Tips You Need to Know
 How to Use Shower Steamers: Ultimate Guide for Relaxation
 Should I Insulate a Shower Wall?: Essential Benefits Revealed
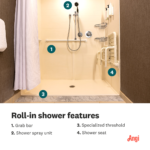 What is a Roll in Shower: A Complete Guide to Accessibility
 How to Remove Shower Handle: A Step-by-Step Guide