

Installing a shower valve might seem daunting. But it’s manageable with the right guide.
A shower valve controls water flow and temperature in your shower. Installing a new valve can enhance your shower experience and fix common issues like leaks or inconsistent water temperature. Whether you’re a DIY enthusiast or a first-time home renovator, understanding the basics of shower valve installation is crucial.
This guide will walk you through the process step-by-step. By the end, you’ll have the confidence to tackle this home improvement task. Let’s dive in and make your shower function perfectly!

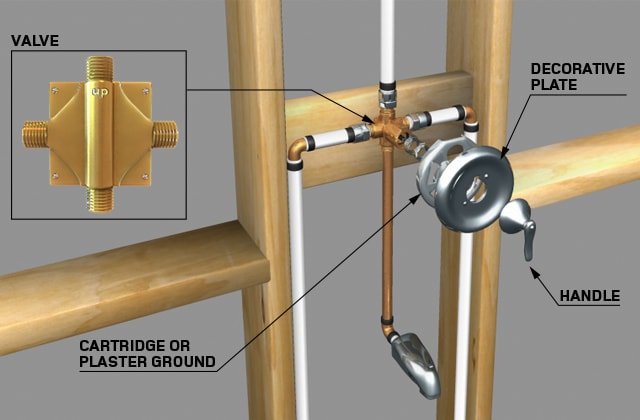
Credit: www.familyhandyman.com
Tools And Materials
A few tools are needed to install a shower valve. You will need a wrench and a screwdriver. A pipe cutter is also important. It helps cut pipes to the right length. A plumber’s tape is useful too. It helps to seal connections well. A level will keep things straight. Finally, a bucket can catch any water spills.
Gather all needed materials first. You will need a new shower valve. Get some pipes and fittings. Plumber’s tape is a must for sealing. Also, have some pipe dope. It helps make sure connections are tight. Keep a rag handy to clean up any spills. Lastly, have a bucket nearby.
Credit: www.rona.ca
Preparation
Gather tools and materials before starting the shower valve installation. Ensure water supply is turned off to avoid leaks.
Turning Off The Water Supply
First, locate your main water valve. Turn it off completely. This stops water flow. Then, open the shower faucet. This drains any remaining water. Make sure the water is off. Double-check by turning on another faucet. No water should come out.
Removing The Old Shower Valve
Use a screwdriver to remove the handle. Next, take off the trim plate. You may need a utility knife to cut through old caulk. Now, remove the old valve. Use a wrench to loosen the nuts. Pull out the valve carefully. Inspect the pipes for damage. Replace if needed.
Installing The New Valve
Place the new valve in the same spot as the old one. Make sure it fits snugly. Check if the hot and cold water lines align. You may need to adjust them. Proper alignment is key for smooth water flow.
Use a wrench to tighten the nuts on the valve. Ensure they are tight but not too tight. Over-tightening can damage the valve. Check for leaks by turning on the water. Fix any leaks immediately. Finally, ensure the valve is securely in place.
Connecting The Pipes
First, clean the ends of the copper pipes. Use a pipe cleaner or sandpaper. Apply flux to the cleaned ends. This helps the solder stick.
Heat the joint with a propane torch. Touch the solder to the joint. The heat will melt the solder. It will flow into the joint. Let it cool. Check for leaks. Soldering creates a strong, lasting bond.
Cut the PEX pipe to the needed length. Use a PEX cutter. Slide a crimp ring onto the pipe. Insert the fitting into the pipe. Position the crimp ring 1/8 inch from the end.
Use a crimp tool to secure the ring. Check the crimp with a gauge. This ensures a tight fit. PEX is flexible and easy to work with. It resists scale and chlorine. Great for DIY projects.
Testing For Leaks
Carefully test for leaks after installing the shower valve. Turn on the water to check for any drips. Fix any leaks before closing the wall.
Restoring Water Supply
First, turn the main water valve back on. Slowly open the valve to let water flow. This prevents sudden pressure. Check for any water escaping from connections. Tighten connections if needed. Make sure everything stays dry.
Checking For Leaks
Look at all joints and connections. No water should drip. If you find a leak, turn off the water. Then, tighten or adjust the fittings. After fixing, turn the water back on. Recheck for any leaks. Ensure all parts are secure.
Finishing Touches
For the final step, install the trim kit. This kit covers the rough edges. It also makes the valve look neat. Start by placing the backplate over the valve. Make sure it fits snugly. Then, attach the handle. Screw it in tightly. This will ensure it does not come loose. Check the alignment to ensure everything is straight. Finally, test the handle. Turn it on and off to make sure it works well.
Sealing Around The Valve
It’s important to seal around the valve. This prevents water leaks. Use a silicone sealant for this job. Apply a thin bead around the edge. Smooth it out with your finger. This will make it look clean. Let it dry for 24 hours before using the shower. Check for any gaps. If you find any, apply more sealant. A good seal keeps your bathroom dry and safe.
Troubleshooting
Installing a shower valve can be tricky. Ensure the water supply is off before starting. Follow the manufacturer’s instructions closely for a smooth installation.
Common Installation Issues
Leaks often happen due to loose connections. Ensure all connections are tight. Check if the valve is properly aligned. Misalignment can cause water flow problems. Obstructions in the pipes can block water. Clean any debris from the pipes. Incorrect valve size can also cause issues. Use the right size for your shower.
Fixing Leaks
Leaks can waste water and cause damage. First, turn off the water supply. Then, tighten all fittings around the valve. If leaks persist, inspect the valve for damage. Replace any worn-out parts. Use plumber’s tape on threads to prevent leaks. Apply it clockwise and ensure coverage. Finally, test the valve by turning the water back on. Check for any leaks and ensure a proper seal.
Maintenance Tips
Inspect the valve often. Look for leaks or drips. Check for corrosion. Tighten any loose parts. Replace worn-out washers. Ensure everything is secure.
Turn off the water. Remove the valve cover. Clean with a soft cloth. Use vinegar for hard water stains. Avoid harsh chemicals. Rinse well. Dry thoroughly. Reassemble the valve. Turn the water back on. Check for leaks.

Credit: www.youtube.com
Frequently Asked Questions
What Tools Do I Need To Install A Shower Valve?
You will need a wrench, screwdriver, pipe tape, and a pipe cutter. These tools help you install the shower valve efficiently.
How Long Does It Take To Install A Shower Valve?
Installing a shower valve typically takes about 1-2 hours. The time may vary based on experience and complications.
Can I Install A Shower Valve Myself?
Yes, you can install a shower valve yourself. Follow the manufacturer’s instructions and ensure you have the necessary tools.
How Do I Remove An Old Shower Valve?
Turn off the water supply, then use a wrench to unscrew and remove the old valve. Be careful of water spills.
Conclusion
Installing a shower valve might seem daunting, but it’s doable. Follow the steps carefully. Gather all tools and materials beforehand. Ensure the water supply is off. Work methodically and check for leaks. A properly installed shower valve enhances your shower experience.
It also prevents potential plumbing issues. Take your time, and don’t rush the process. Happy renovating!
Related posts:
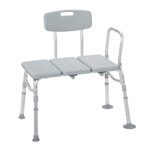 Best Shower Benches: Top Choices for Comfort and Safety
 Best Shower Cap to Keep Hair Dry: Top Waterproof Choices for Women
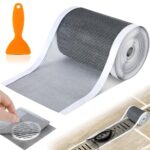 Best Shower Drain for Long Hair: Say Goodbye to Clogs Today!
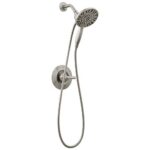 Best Shower Faucet Set: Top Picks for a Luxurious Bathroom Upgrade
 Best Metal Shower Head: Top High Pressure Options for Ultimate Shower Experience
 Best Shower Filter for Hair And Skin: Top Vitamin-Infused Choices
 A Boys Taking a Shower: Essential Hygiene Tips for Teenagers
 How Many Gpm is a Shower: Understanding Water Flow Rates
 What is a Roll in Shower: A Complete Guide to Accessibility
 How Much Weight Can an Acrylic Shower Hold: Surprising Facts